Judy's Magic Cast-On - Andrea's Modified Version
Judy's Magic Cast-On is a really useful technique for starting projects like toe-up socks. Judy's original cast on instructions can be found on Knitty and on Judy Becker's website. I work my magic cast on a little bit differently - I like to wrap my yarn the around the needles the opposite direction of Judy's just because I personally find it a little easier to do. The result is the same, though.
In this tutorial, I use a 32 in/81 cm circular needle and the magic loop method. You could also use double pointed needles or two circulars if you prefer.
I recorded a video of the method, or scroll down for the photo tutorial.
Video
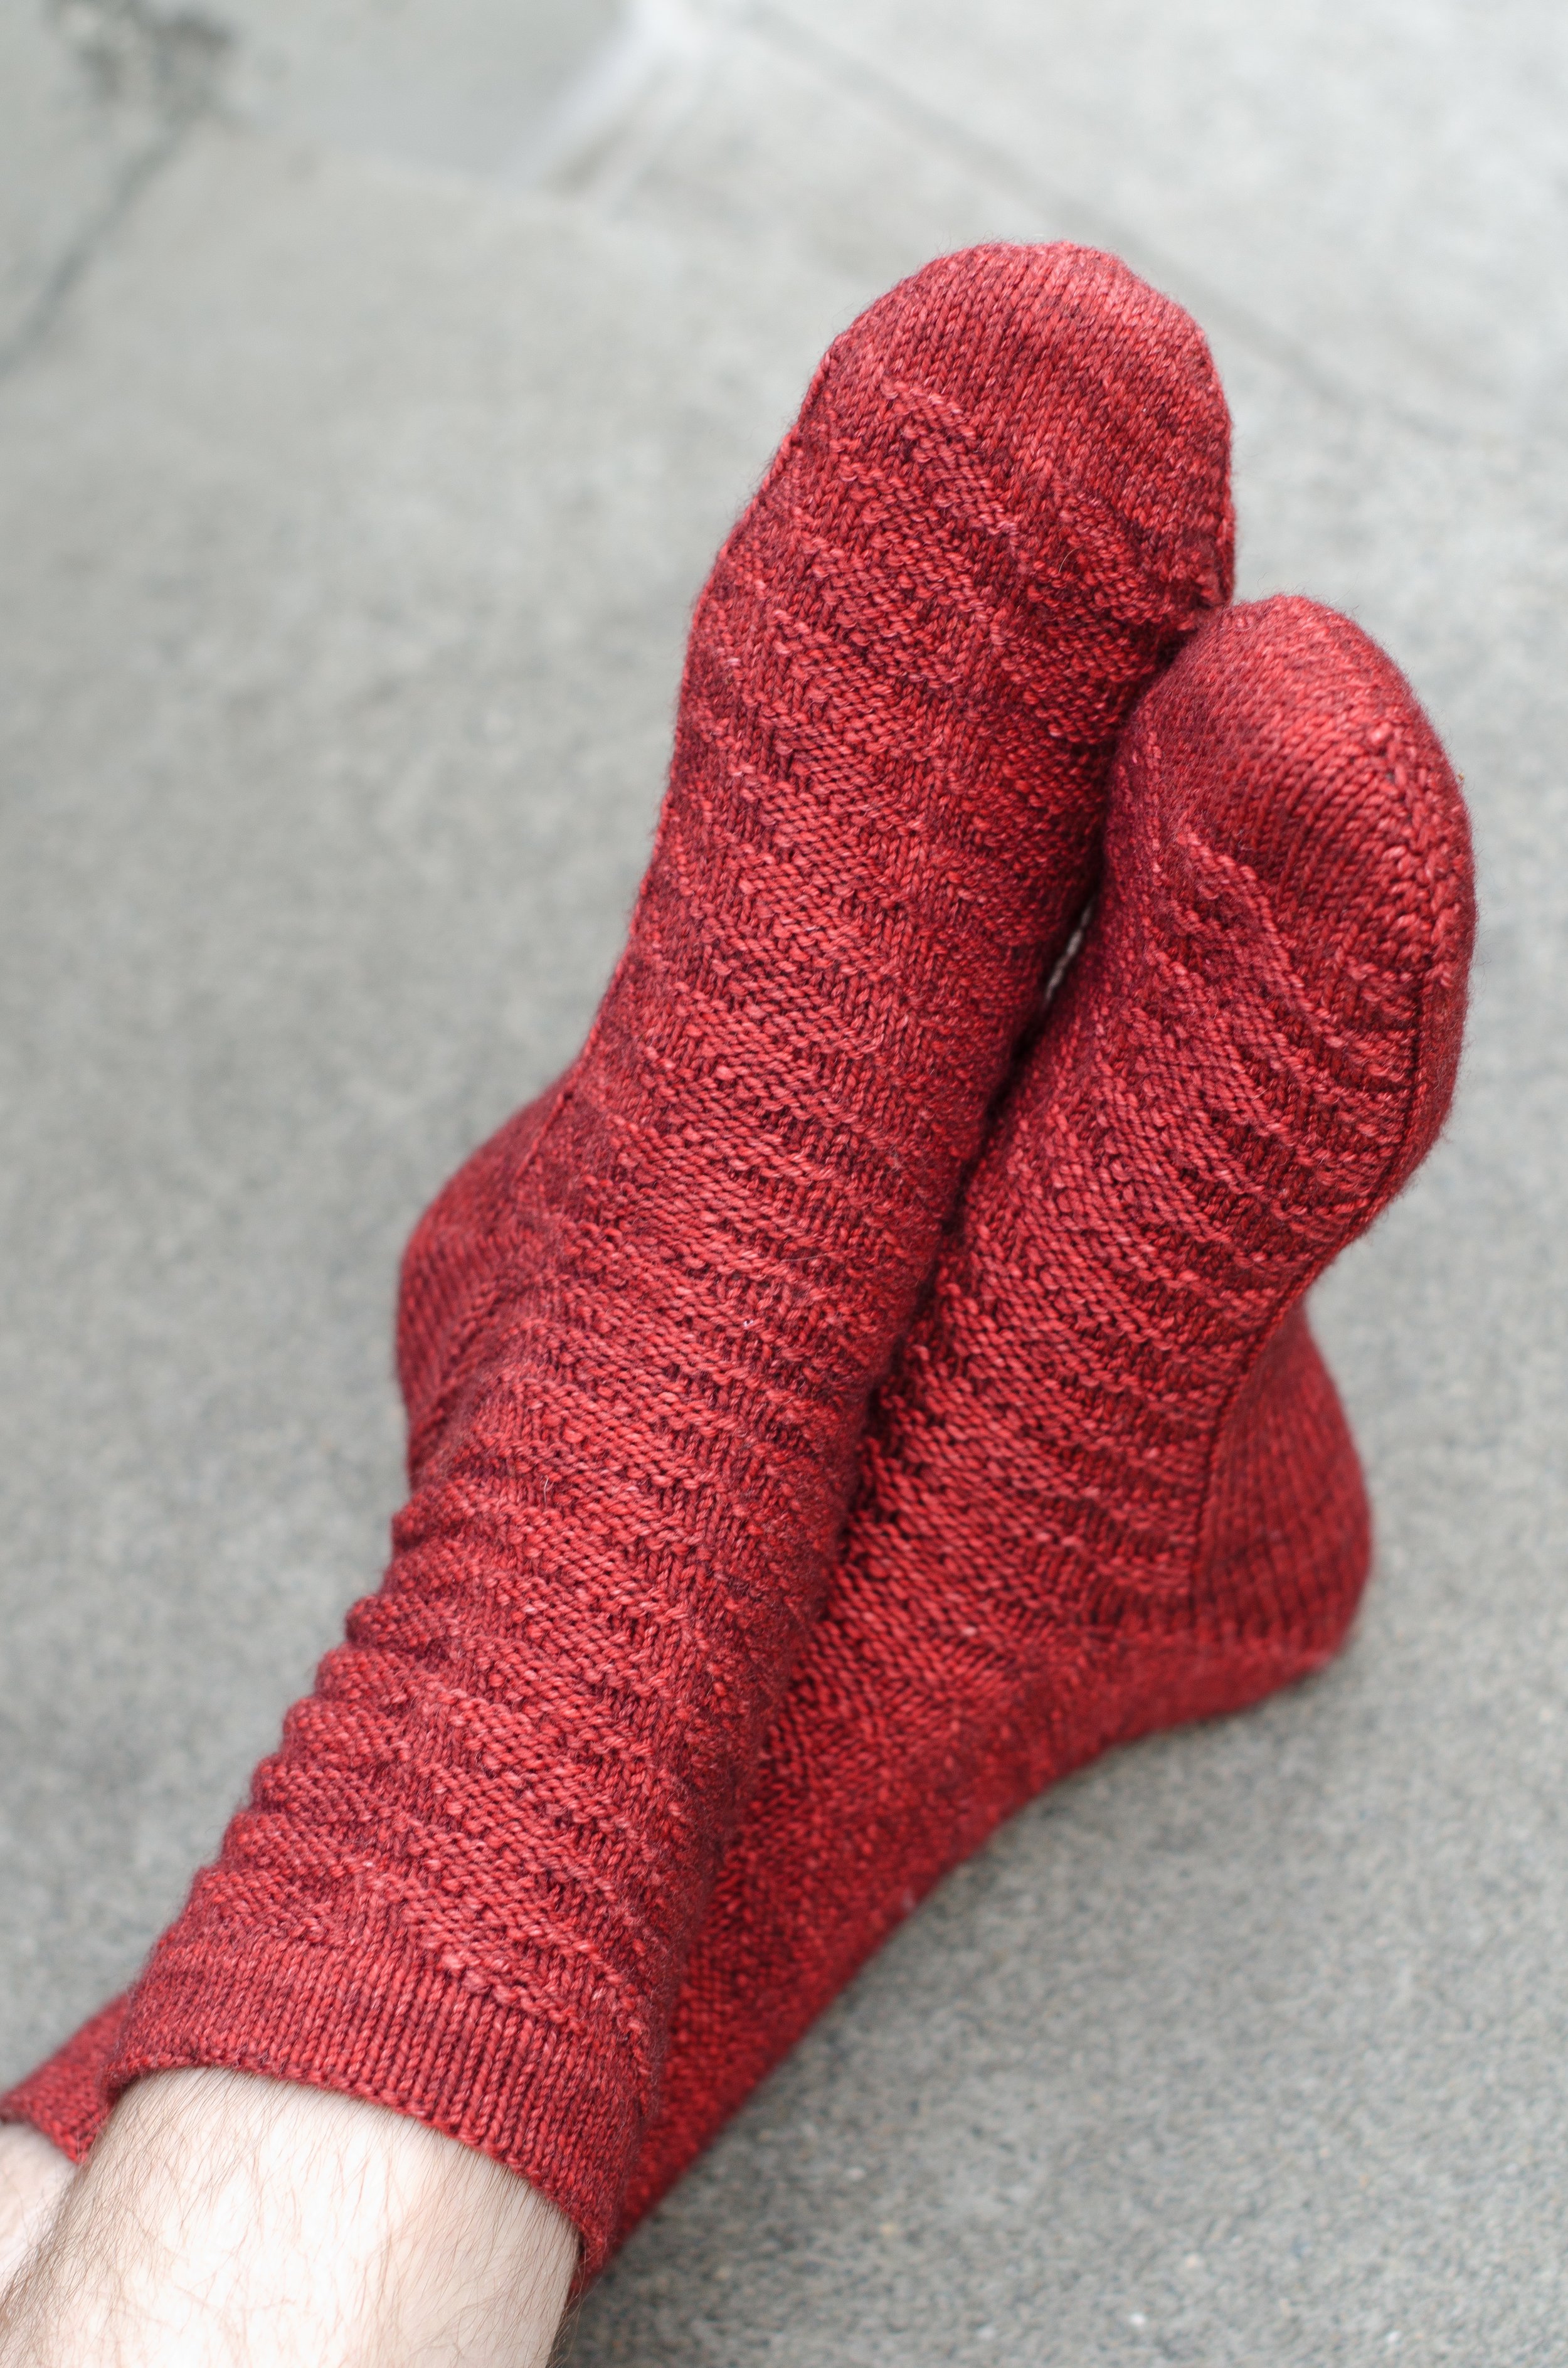
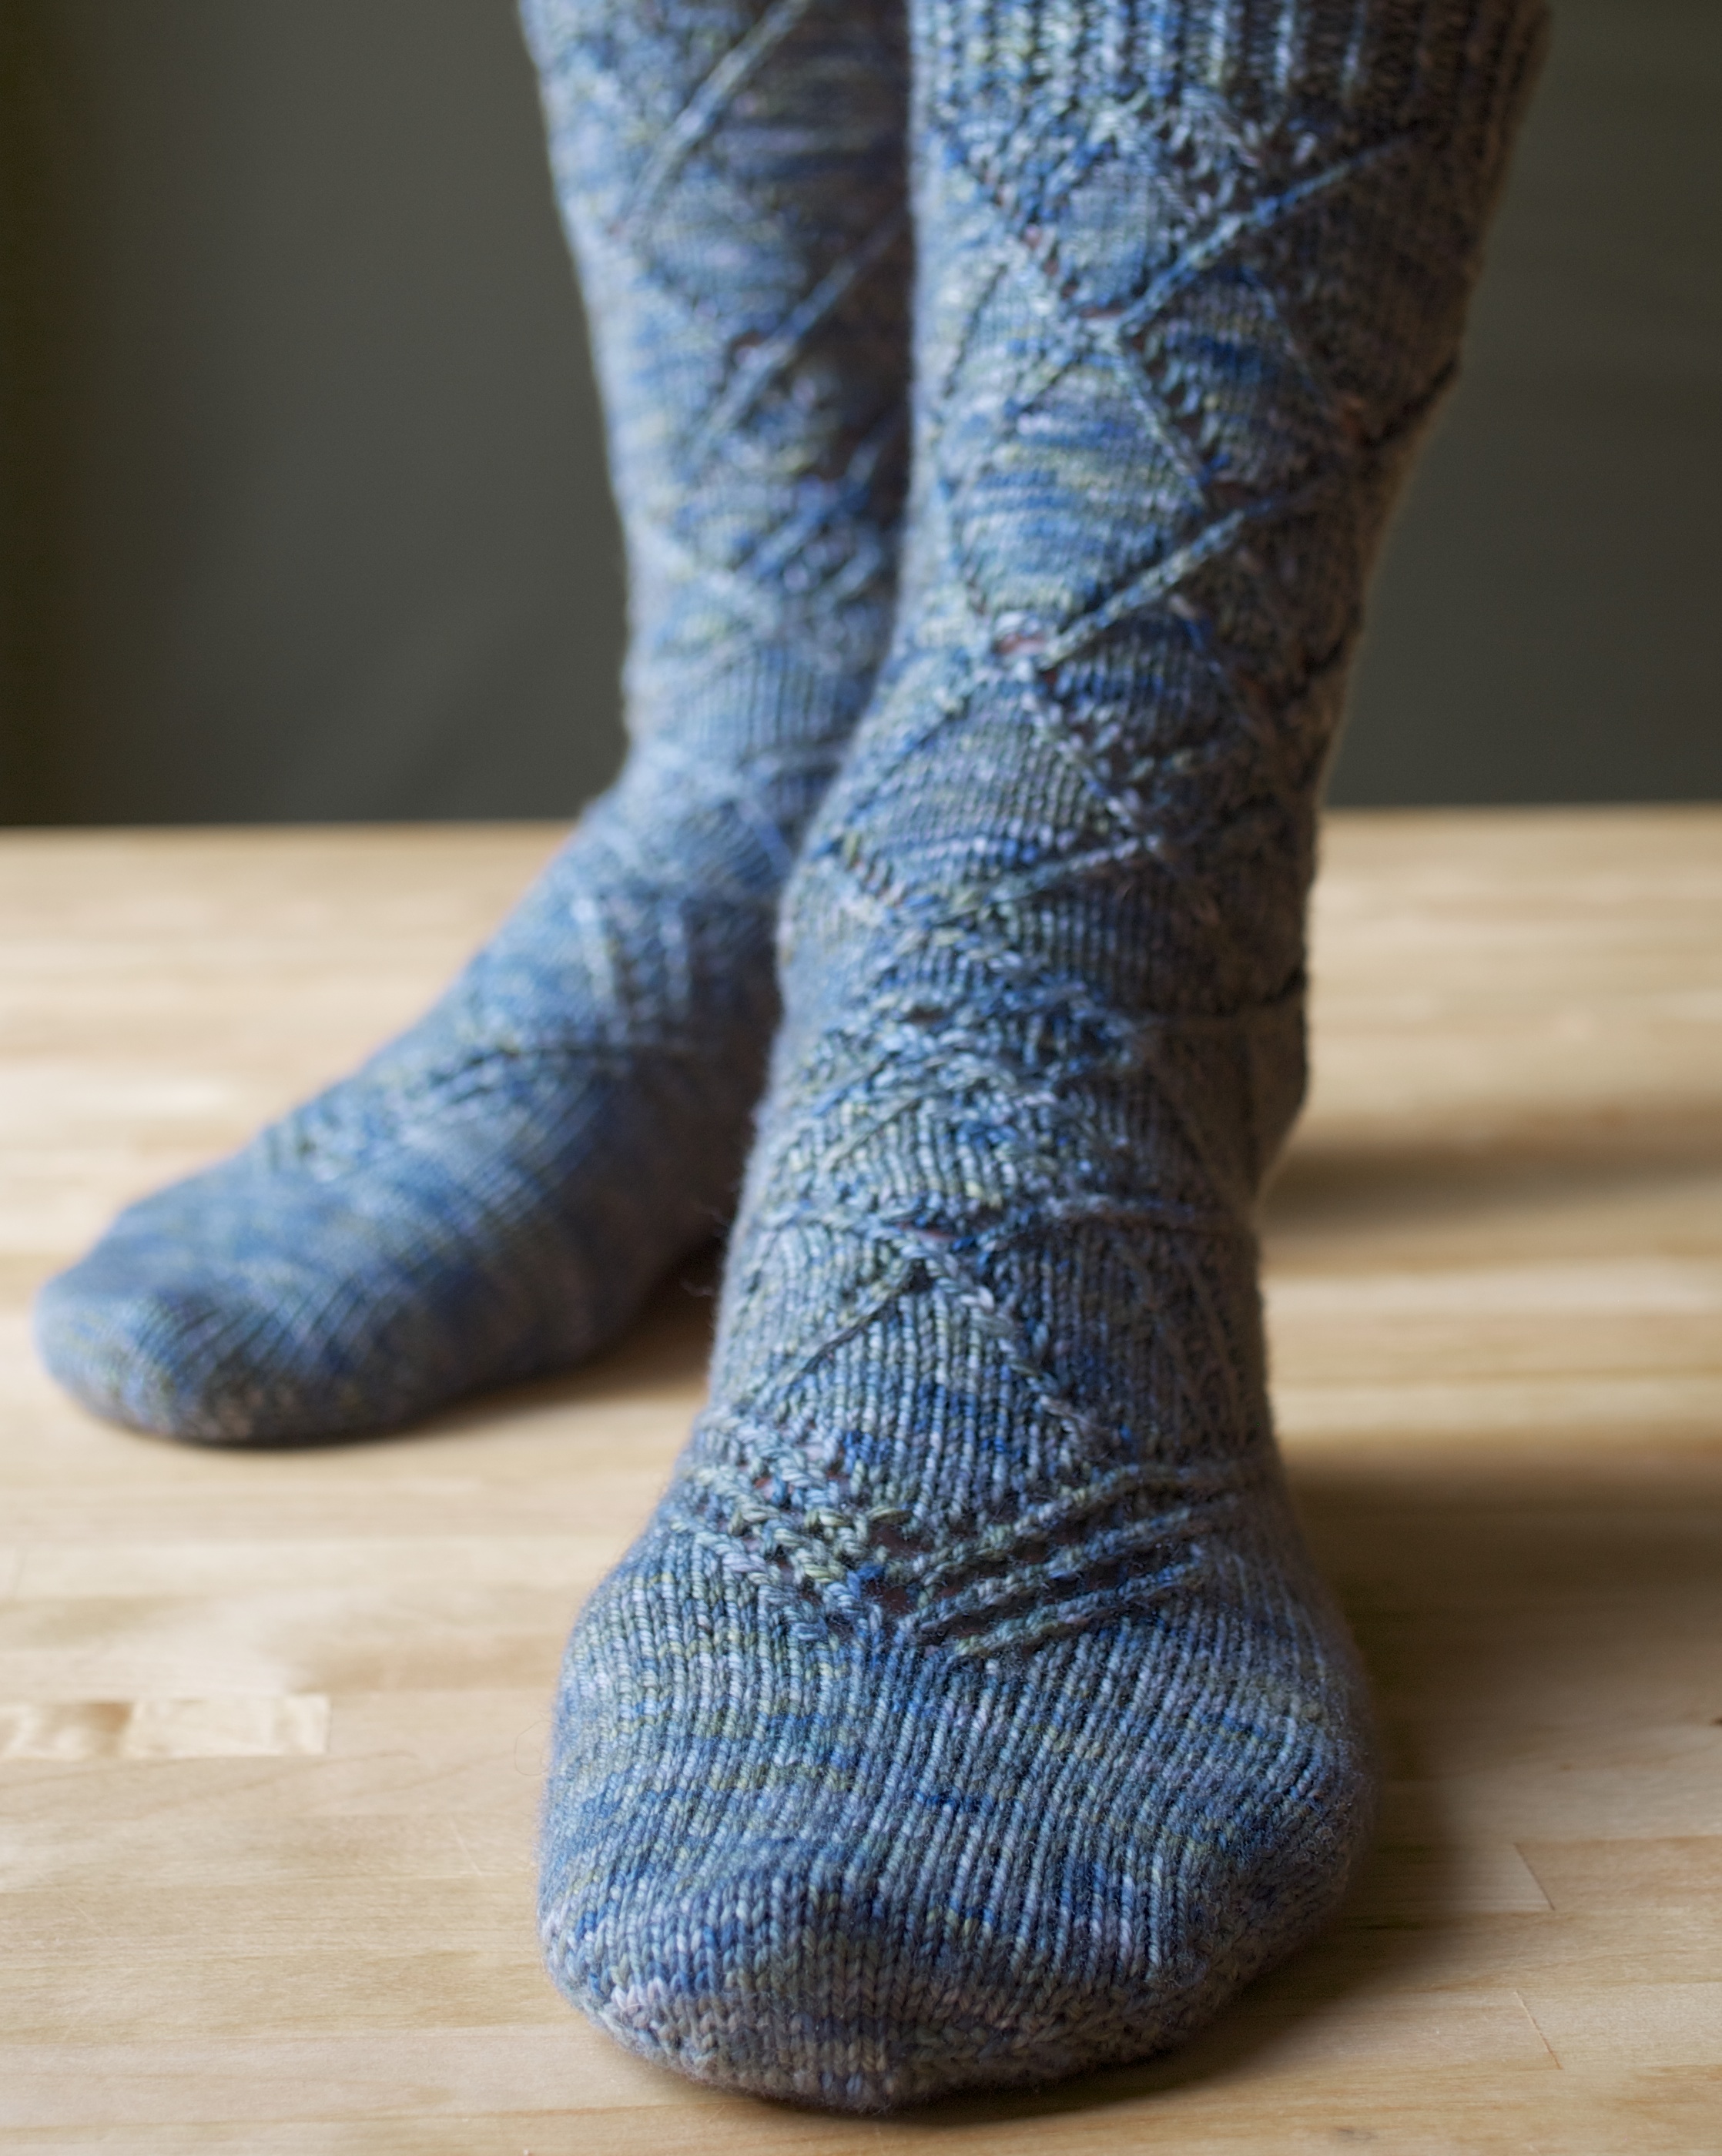
This method makes the first half of my stitches oriented so the leading legs are in back, so I just knit through the back loops for those, then continue working as usual. This is how I start toe-up socks like Clochan, Resin, & the latest Gauge Dye Works summer club pattern, Saxe Point.
Photo Tutorial
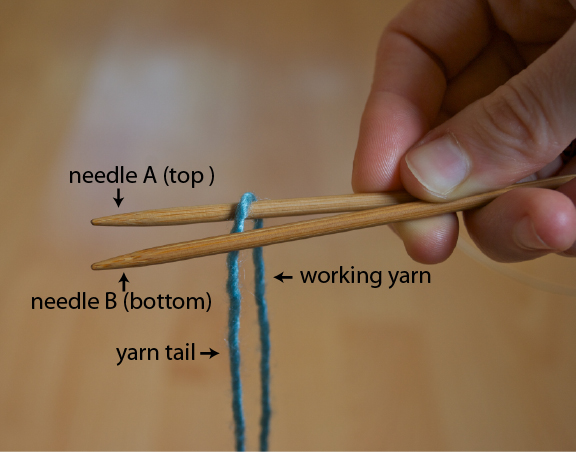
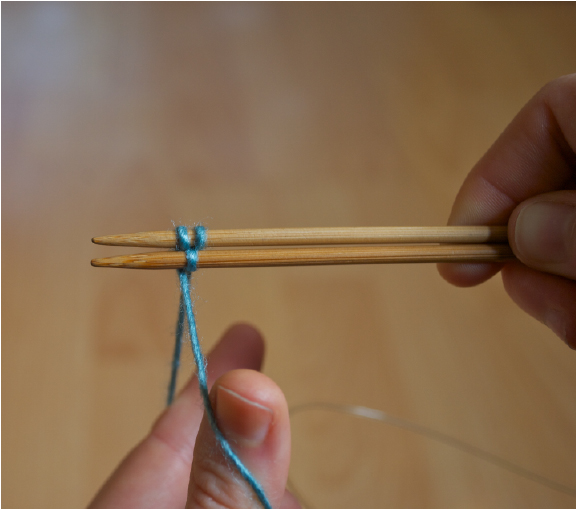
1. Arrange the needles so that one is on top (needle A) and one is on bottom (needle B) in your hand. Without a slip knot, place the yarn over needle A, with the working yarn coming off the back of needle A.

2. Arrange the yarn in your left hand as if working a long tail cast on with the working yarn over your index finger and tail over your thumb, and both strands held firmly in your palm.
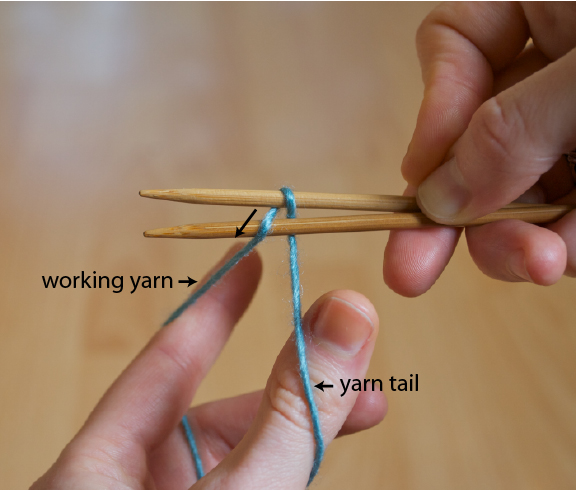
3. Bring the working yarn (on your index finger) between the needles and over needle B.

4. Bring the yarn tail (on your thumb) between the needles and over needle A. When you do this, the tail will cross over top of the working yarn before it goes between the needles.
Repeat steps 3 - 4 until you have the desired number of stitches on the needles.
Be sure to pull each stitch firmly as you wrap it around the needle to avoid a row of loose stitches at the cast on.
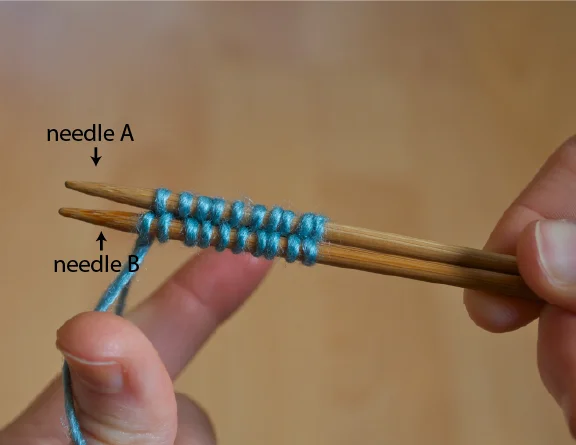
This picture shows 10 stitches on needle A and 10 stitches on needle B.

5. Drape the tail over the top of the working yarn and place the needles in your left hand to begin working. Draw needle A (now on the bottom) through so that all the stitches on it are on the cord. I hold the tail firmly in my right hand to keep it out of the way and to provide a firm stitch to work into.
6. All of the stitches on needle B are on backwards*, so knit into the back loop of each one in order to avoid twisting them. If the first stitch comes loose as you work, just give it a tug to tighten it up.

All the stitches on needle B have been worked.

7. Pull the cord so that all the stitches on the cord are on needle A are and are ready to be worked. Draw needle B through so that the worked stitches are all on the cord.
8. Knit across the stitches on the second needle. (These ones are not on backwards, so knit into the front of each stitch, as usual.) You've now worked 1 round.
This picture shows the completed round.
Continue working as established, increasing at the beginning and end of both needles if your pattern calls for that. After working a few rounds, I always take a moment to look closely at my cast on row to make sure I'm hapy with it. If it looks too loose or too tight, as compared to the stitches around it, I'll pull it out and start over.
*"Backwards" is subjective, but I think it's the easiest way to label stitches that have their leading legs in back rather than in front, the customary direction. If you were to knit into the front legs of these stitches, they would be twisted; knitting into the back of them avoids that. If you knit using the Combination Method, you'll be accustomed to stitches showing up "backwards".
Patterns That Use This Technique