Knitted-in Hem
A knitted-in hem provides a very clean and neat edging, and can be a perfect way to create an encased elastic waistband.
Before you begin following the instructions in this tutorial, you'll need to have worked your hem. This usually consists of working a provisional cast on, then working a certain length in Stockinette Stitch. Purl 1 row/round (turning row/round), then work the exact same number of rows that you worked before the purl row/round. Remove the provisional cast on and place the live stitches on a needle the same size as you worked your hem in. If you are encasing elastic, be sure to place the elastic in between the layers before you begin knitting in the hem.

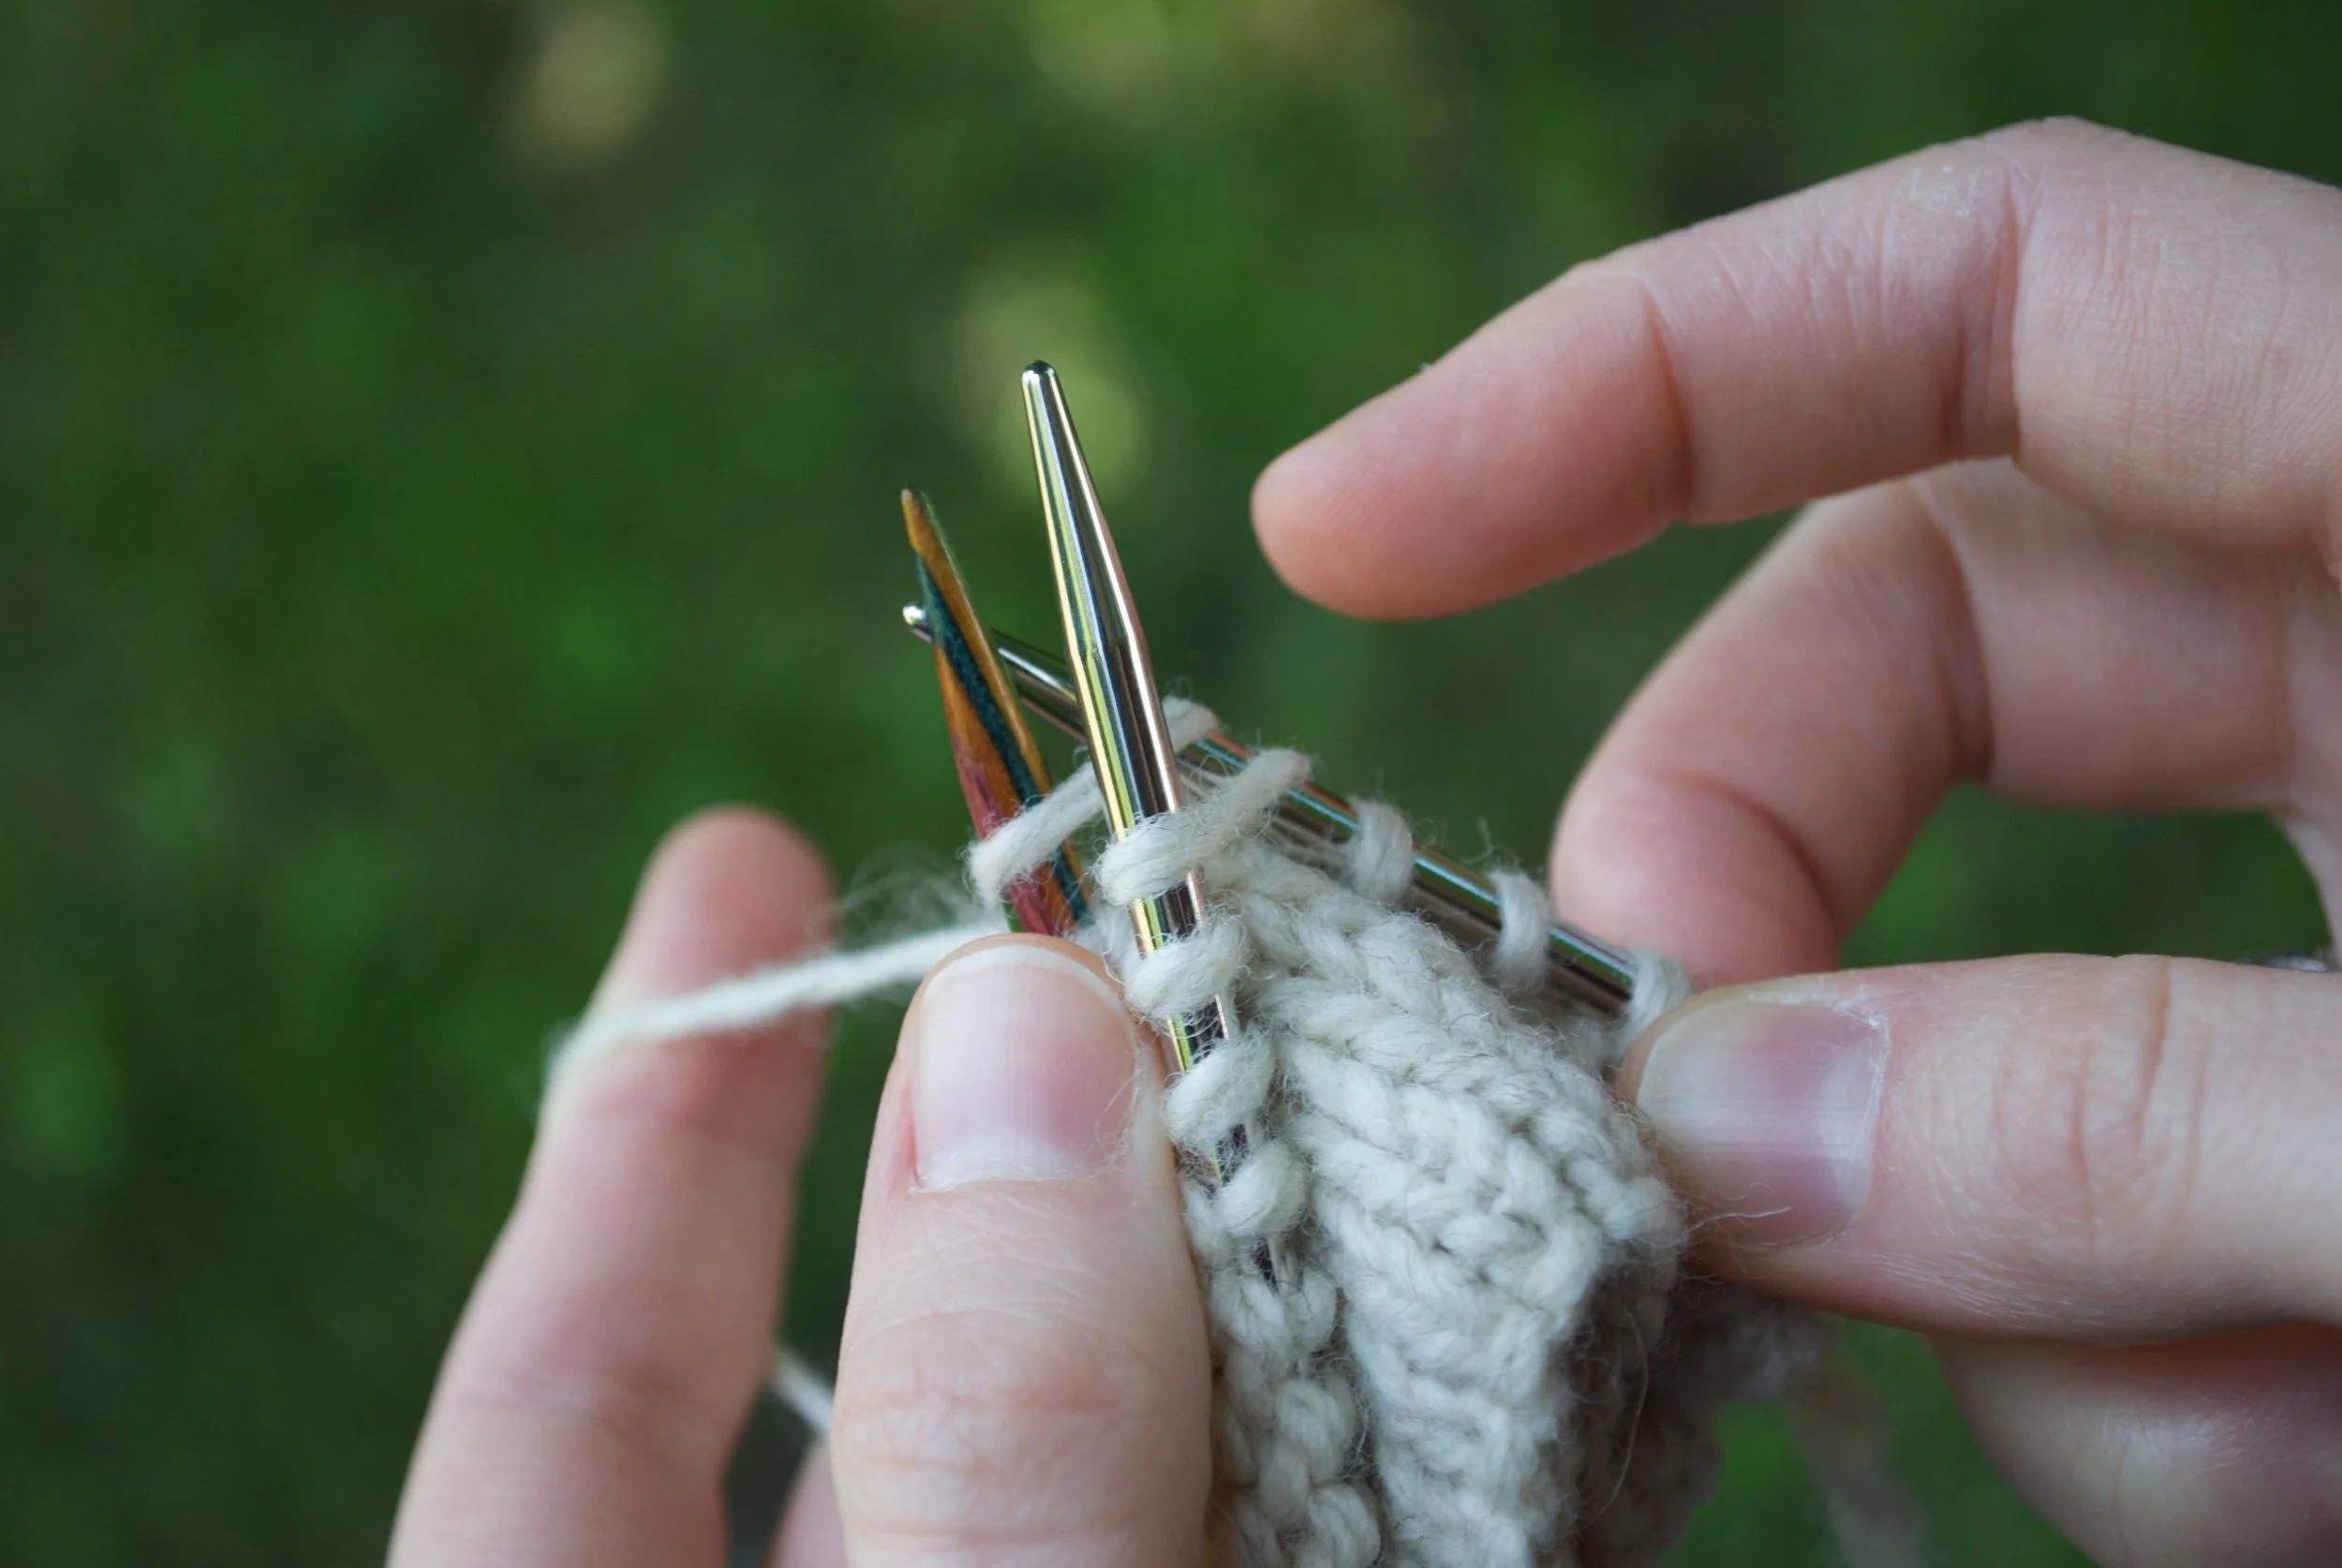
Fold your hem at the turning row so that he wrong sides of the fabric are together and the needles are touching each other with the working stitches in front of the stitches from the cast on.
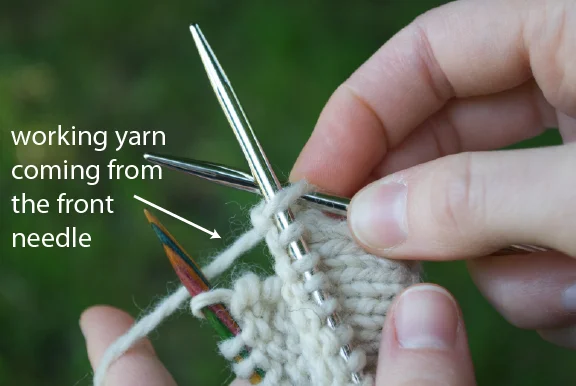
Insert a third needle into the first stitch on the front needle.
Then insert into the first stitch on the back needle.
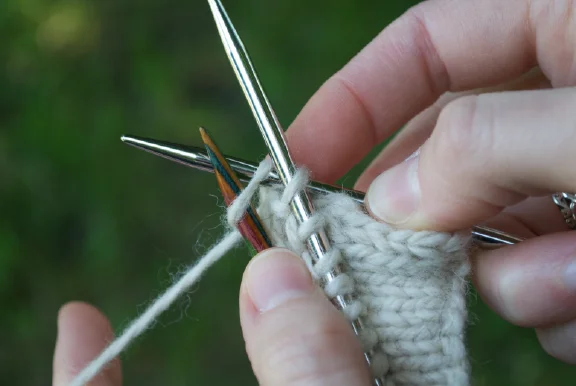
Wrap yarn around needle and draw through both stitches, knitting the two together.
Push both stitches off the left needle, just as you would do to complete a regular knit stitch.
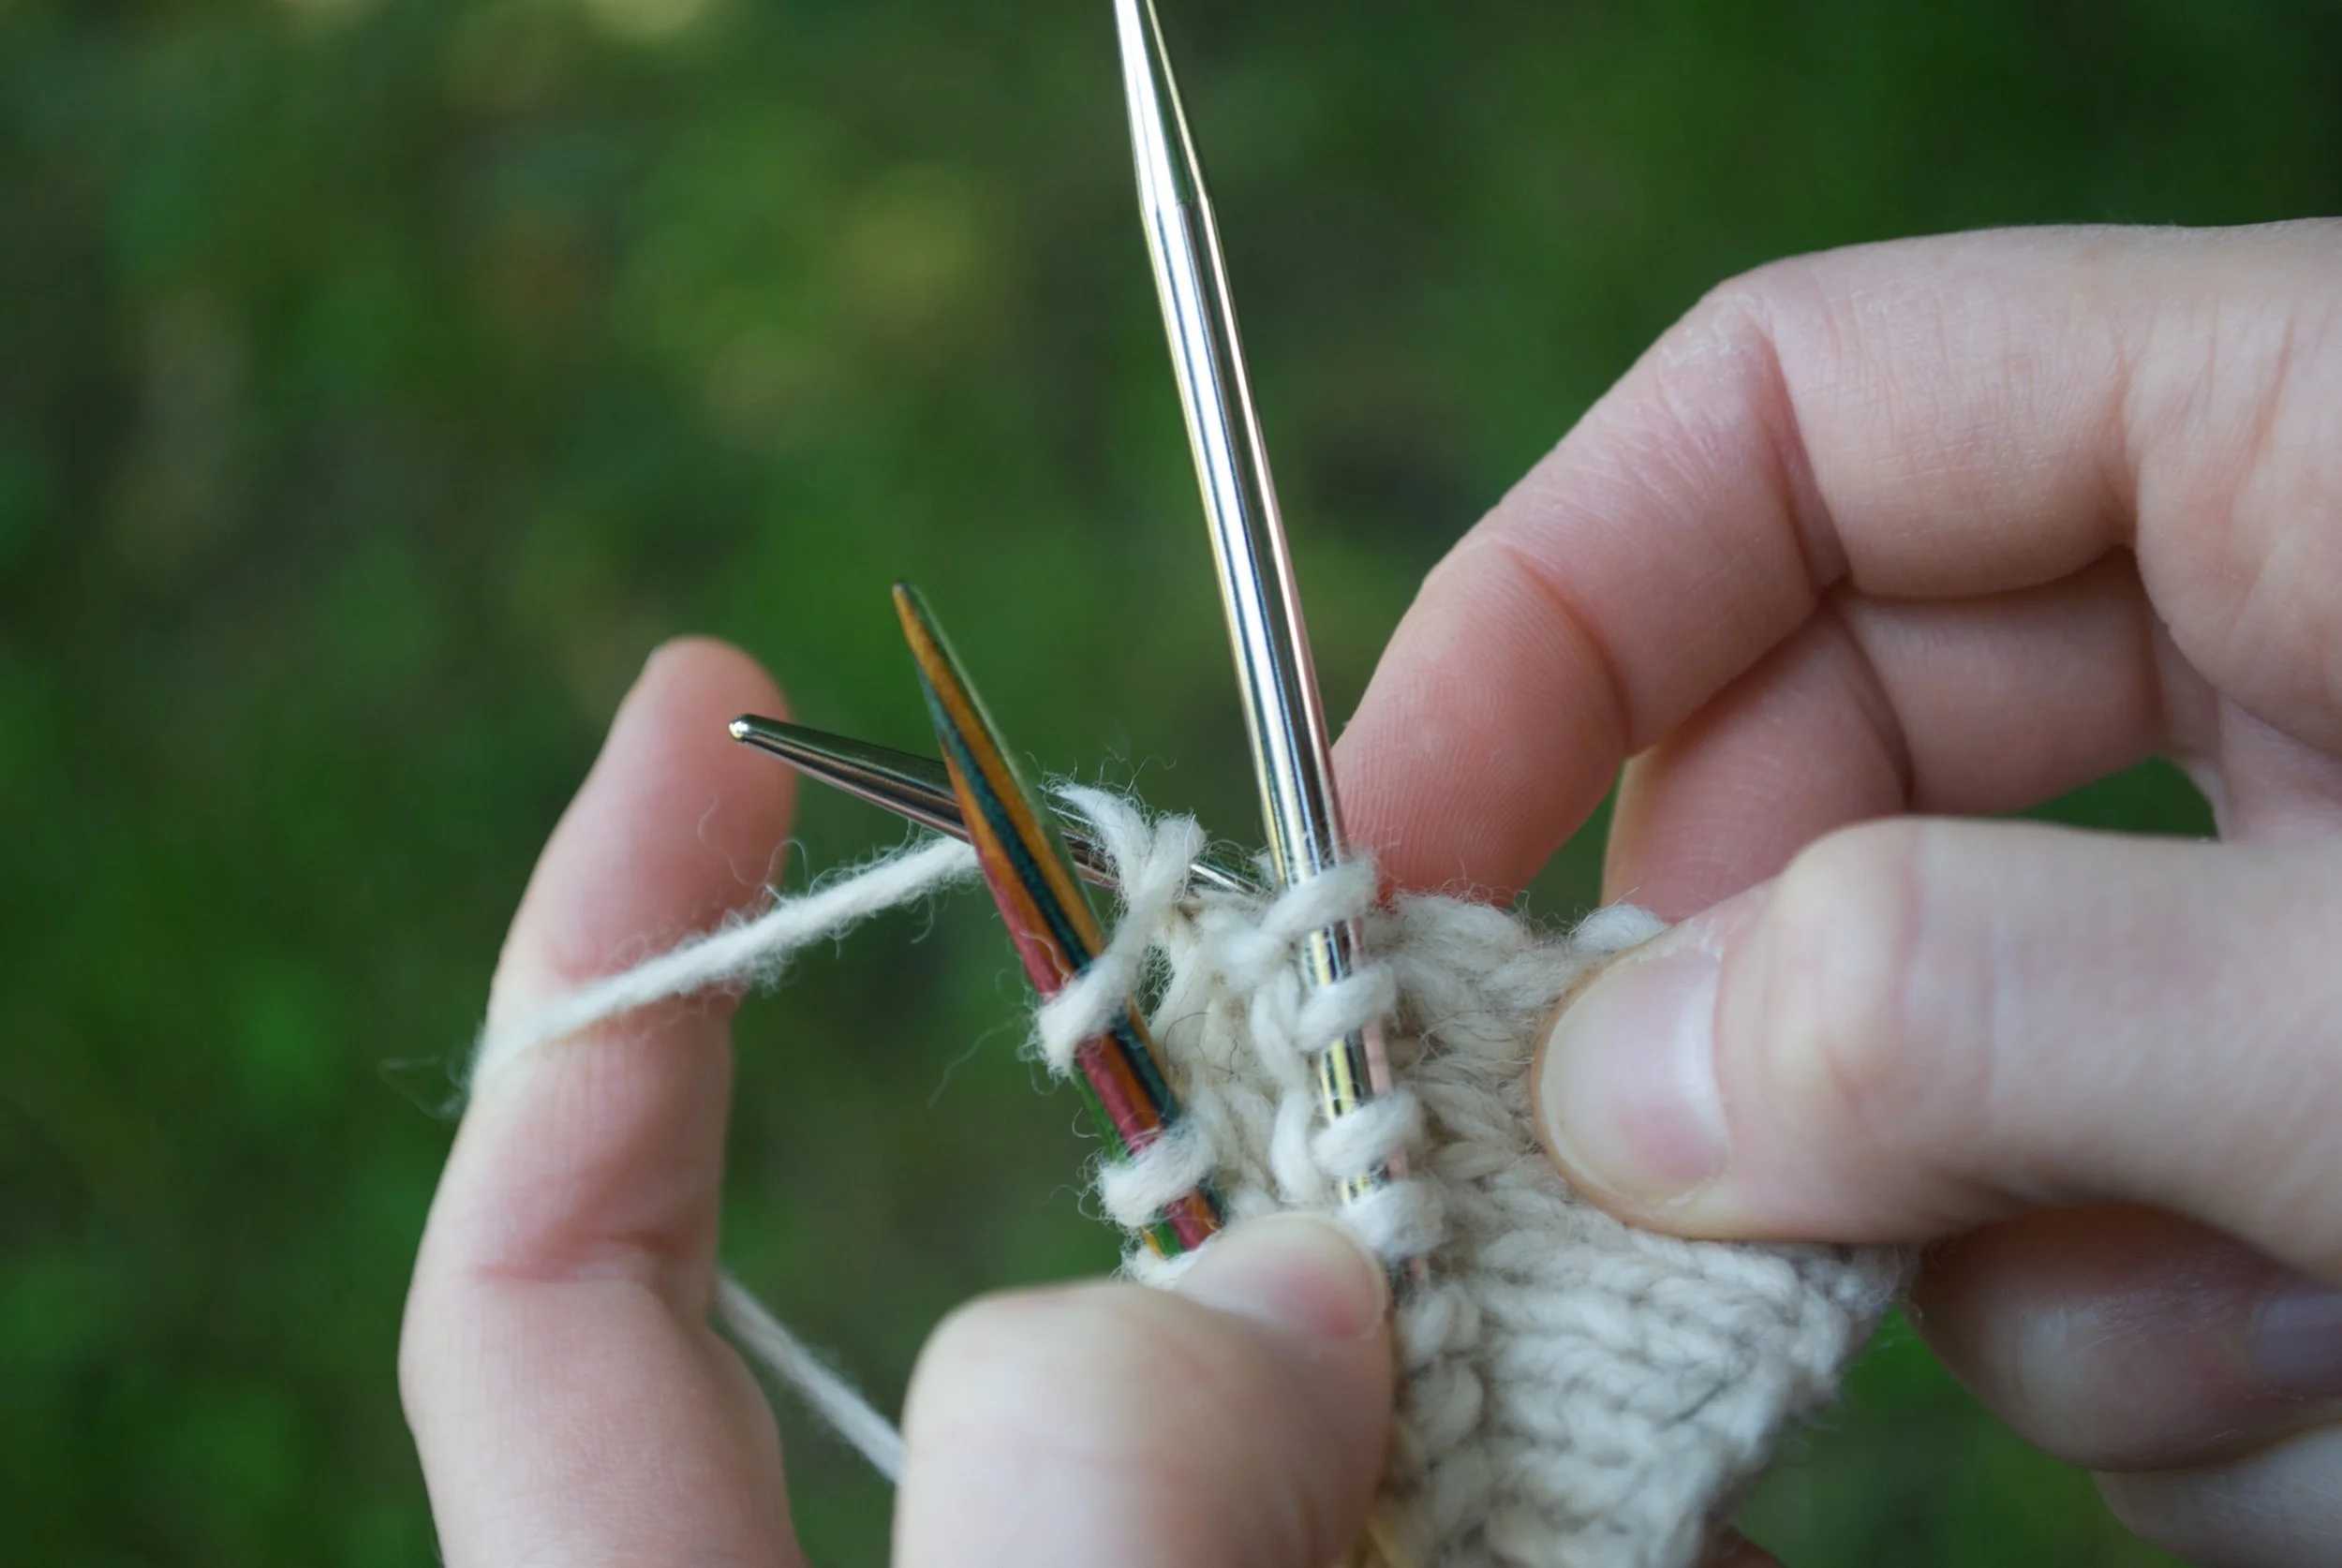
Repeat with all stitches, inserting into the next stitch on the front needle and then into the next stitch on the back needle, and knitting them both together.

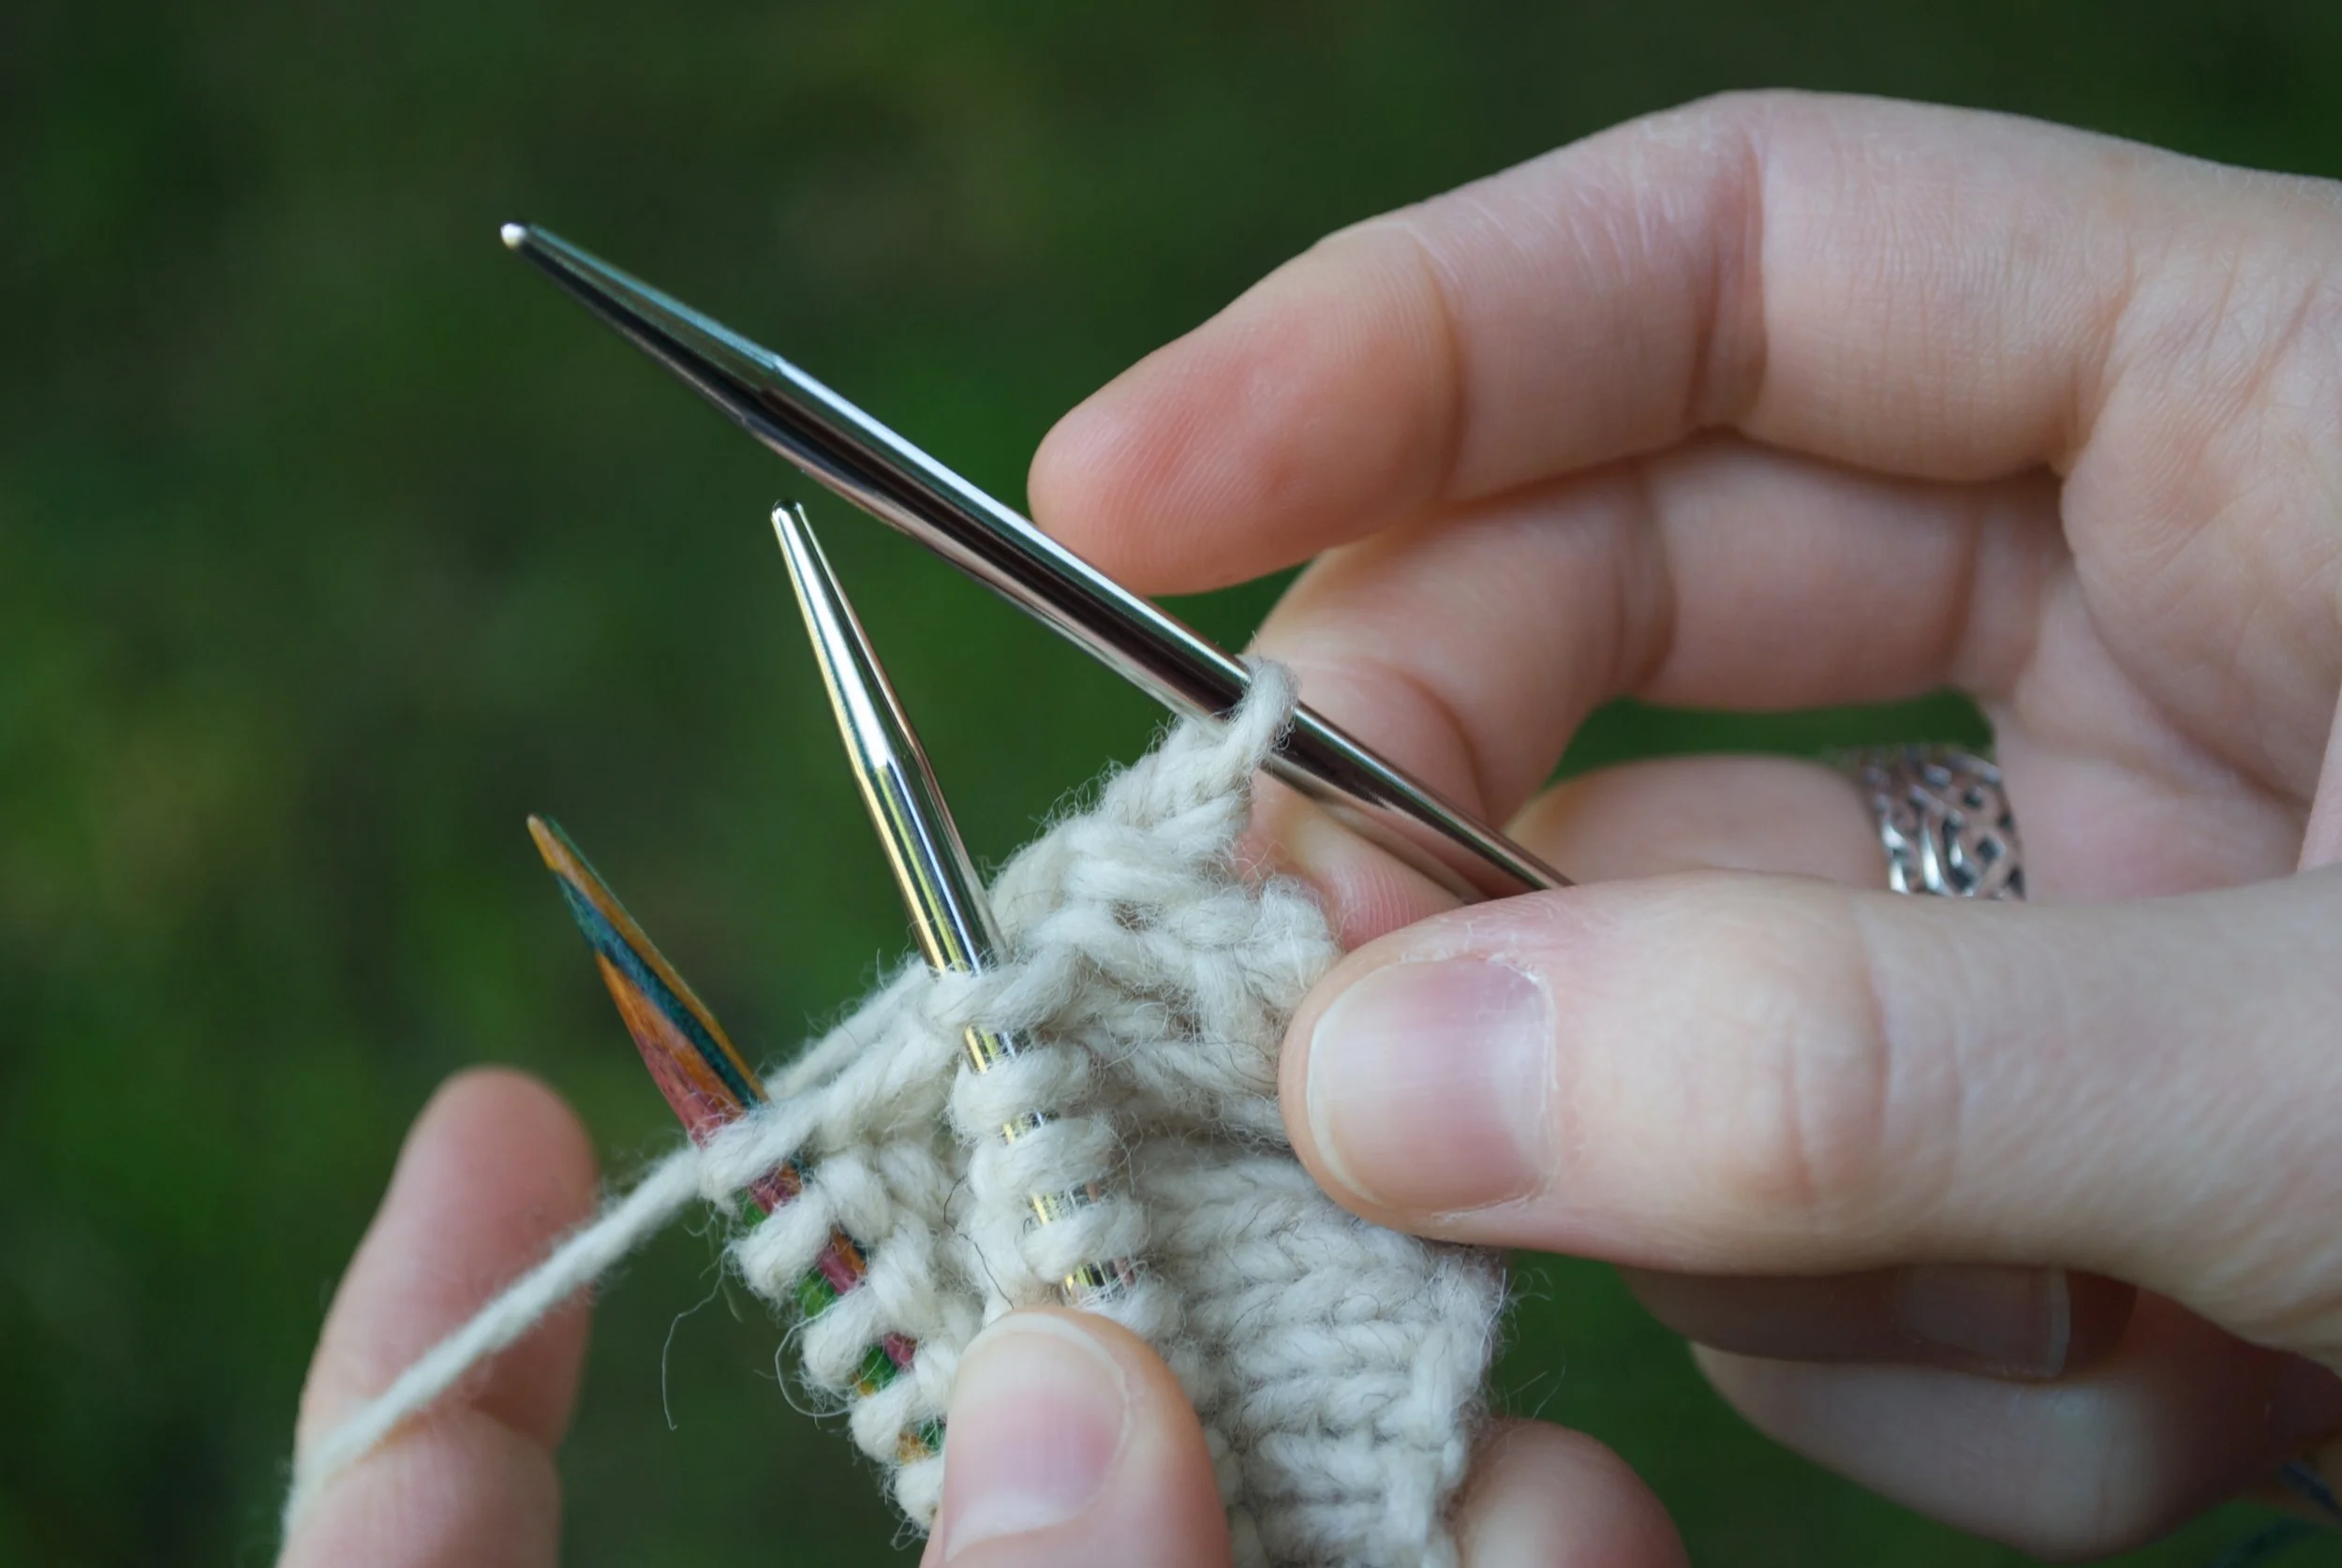
When all stitches have been worked, you'll have a double-layered fabric and just one needle with live stitches. After working a few more rows, you can see that the hem is very clean and neat, allowing for a Stockinette stitch edge that does not curl.
Patterns That Use This Technique

