Using Stitch Markers (or not)
There are some things in knitting that folks are just expected to know so they aren’t included in patterns. I think we tend to pick these things up as we go, but here’s one that can confuse folks the first time they make a pair of socks or a sleeve (any project that’s worked in the round but is too small to be worked on a standard circular needle like a hat or sweater body could be) — using stitch markers.
Most patterns these days instruct knitters to place a marker to show the beginning of the round. This is great because it tells you that this spot is important and needs to be marked, but also avoids making assumptions about your knitting style. You can achieve the same results with lots of methods and you should choose the one that works for you, so I love that patterns aren’t specific about this! But in practice, placing your marker at the beginning of the round usually doesn’t actually work because there often aren’t stitches on either side of the markers to keep them in place. They just fall right off if you do exactly as the pattern says. So here’s what to do instead.
Using Stitch Markers (or not)
When working a small circumference in the round, you may be using double pointed needles, a long circular needle for magic loop method, two circular needles, or a very short circular needle. Here’s what to do about stitch markers for a few different styles. The following assumes you’re making socks, but this works equally well for sleeves or other small-circumference projects.
Magic Loop and Two Circular Needles: If you’re using the magic loop method or two circular needles, you can refer to the location of your cast-on tail to show you the beginning of the round. Then separate your stitches, placing the “break” between one needle and the next at the halfway point. You can also use this separation point to guide you if you’re working on a pattern where one thing happens on the front of the leg and something else happens on the back. Just divide your stitches so the front stitches are in one section and the back stitches are in the other, providing you with an easy cue so that you don’t need stitch markers at all.
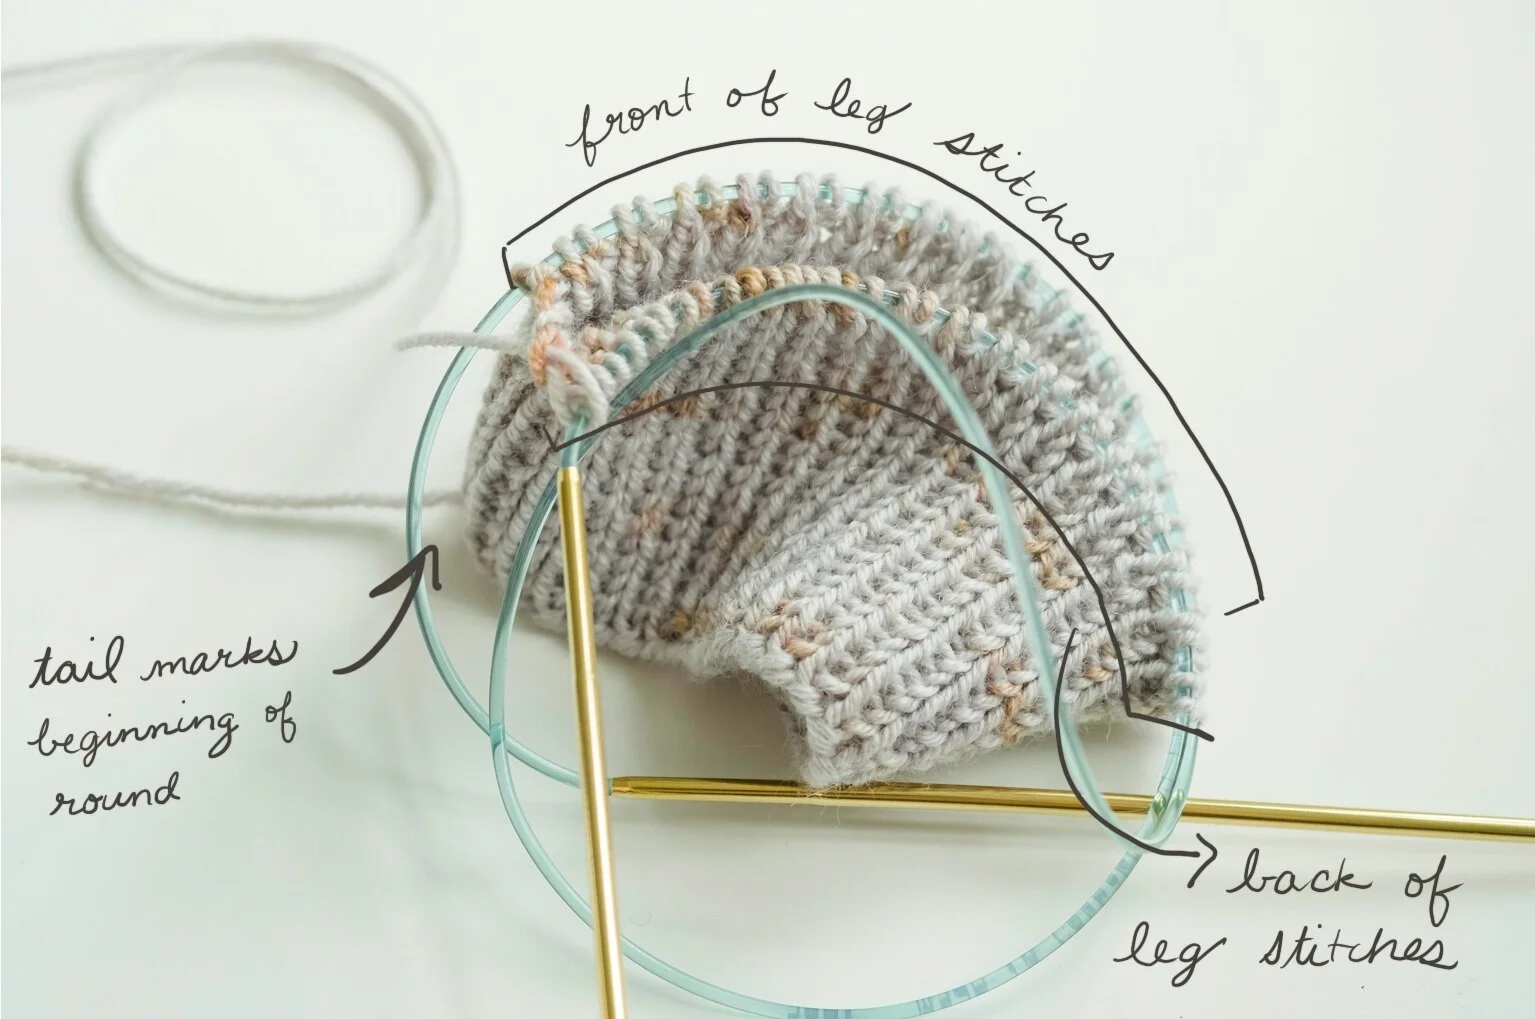
A sock cuff work-in-progress in grey yarn on a long circular needle. Cursive text and arrows show where the tail is marking the beginning of the round and stitches in one section for the front of the leg and another section for the back of the leg.
Double Pointed Needles: Your cast-on tail can show you the beginning of the round. If you’re using four needles (dividing your stitches among three needles), divide your stitches by three (approximately, as it may not be exact and that’s fine) and place a stitch marker or markers if any are indicated in the pattern, like to separate the front of the leg and the back. Just make sure the marker spot isn’t exactly at a separation point, or alternately, use the separation point as your guide.
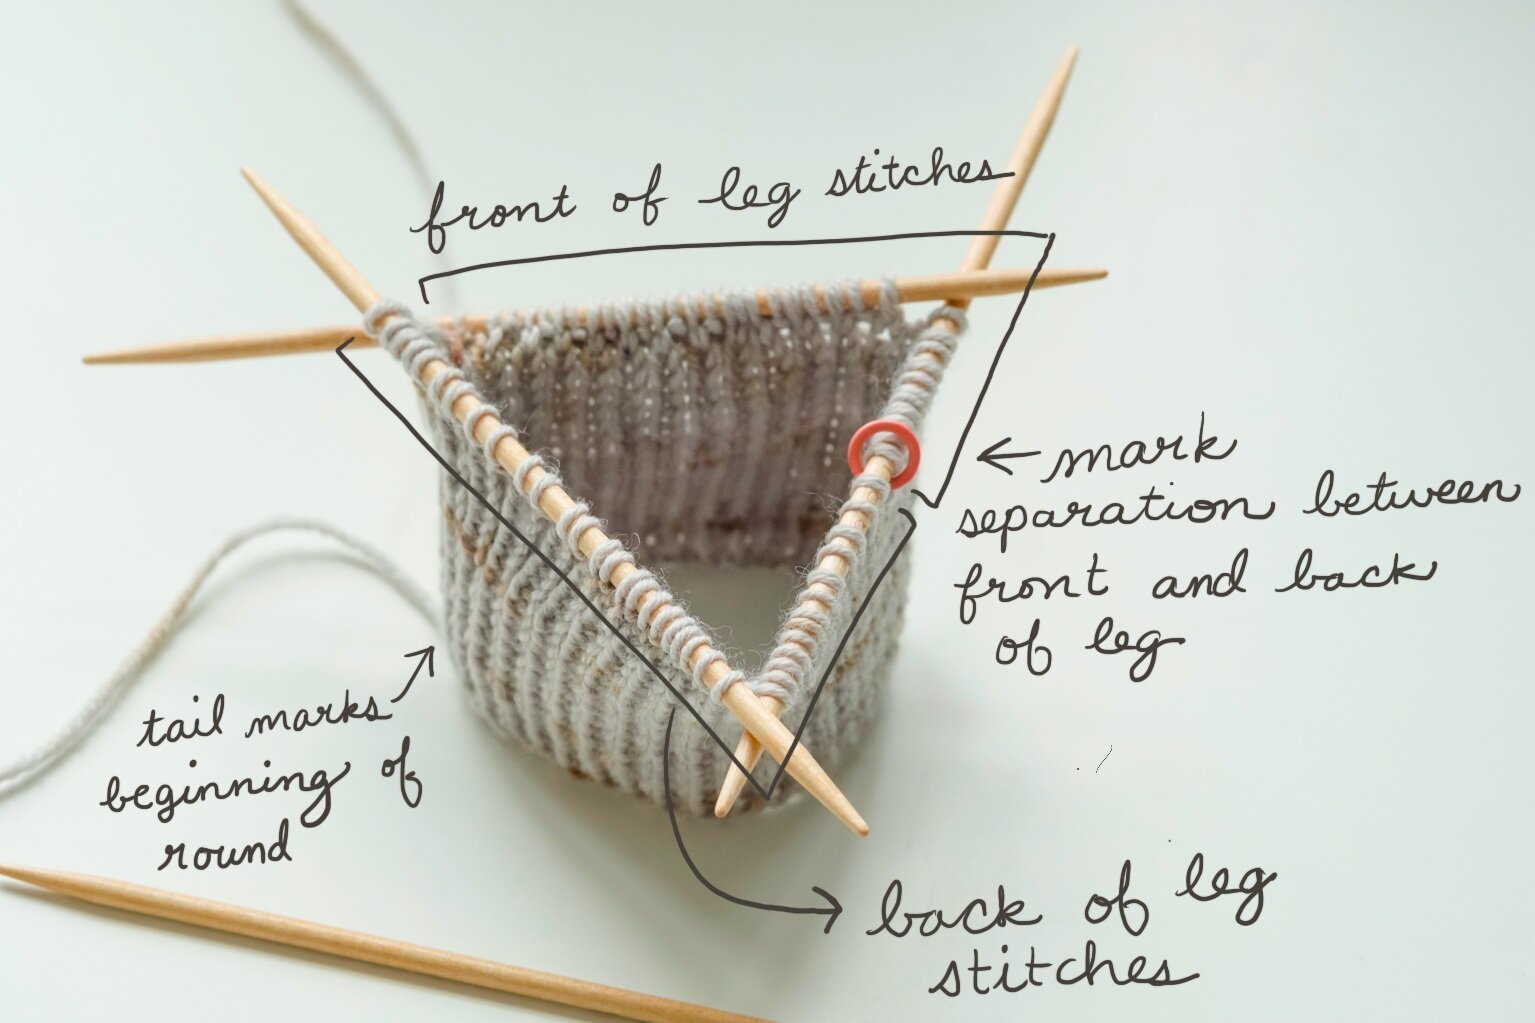
A sock cuff work-in-progress in grey yarn on three double pointed needles. Cursive text and arrows show where the tail is marking the beginning of the round and an orange stitch marker on one of the double pointed needles is marking the separation between front and back of leg stitches.
If you’re using five needles (dividing your stitches among four needles), use the first two needles for the first half of your stitches (or the front of the leg) and the second two needles for the second half of your stitches (or the back of the leg) so that markers aren’t necessary.
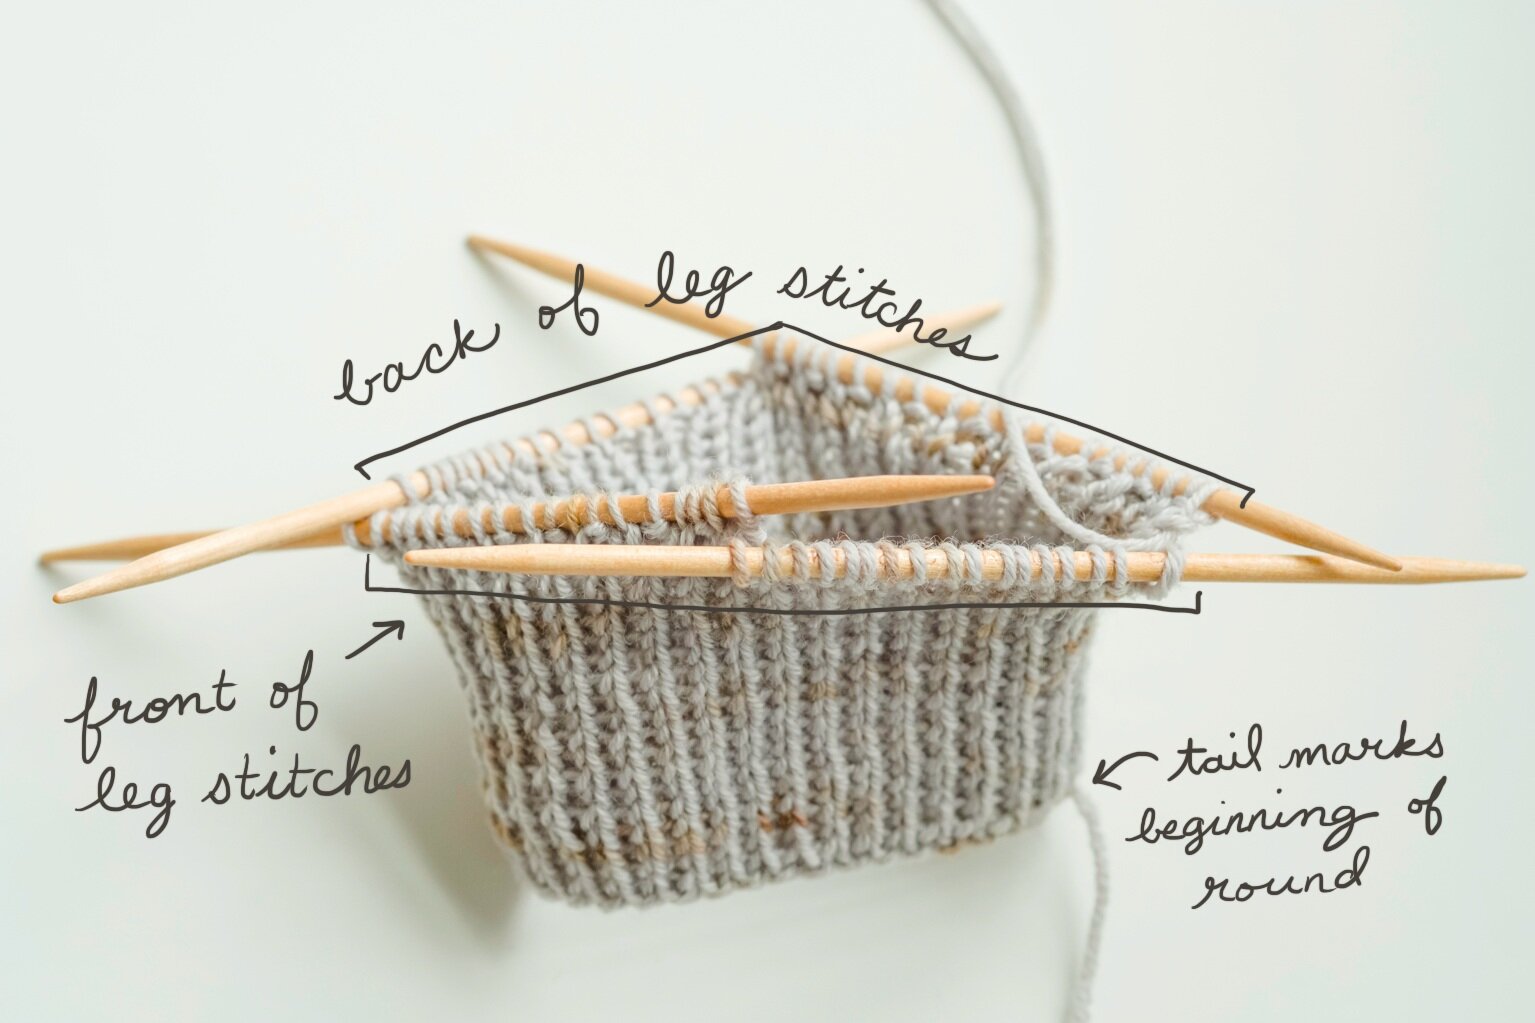
A sock cuff work-in-progress in grey yarn on four double pointed needles. Cursive text and arrows show where the tail is marking the beginning of the round and the front of leg stitches on two needles and back of leg stitches on two other needles.
Short Circular Needle: This one is easy. Just place the markers as indicated.
One More Thing
If you notice that you get a sort of crease or funky-looking stitches near the separation points, it’s a good idea to stagger where those points occur.
Instead of using the needle-change spot as your beginning-of-round marker, use a stitch marker to keep track of the beginning of the round and regularly change the location of the needle-change spots to avoid this problem. With double-pointed needles and two circular needles, you can continuously slip the last stitch of every needle to the next needle. With magic loop, every few rounds just move the spot where the cord comes out—it can be anywhere in your round. Regularly alternating where those transition spots are is the key to preventing obvious bunchy spots.
Just be sure when placing markers that you’ve got at least one stitch on the needle on either side of the marker so that it doesn’t fall off.
You Might Also Like

These mitts are for keeping warm during all kinds of exploration. They’re named after a park I love here in Victoria, Witty’s Lagoon, where you can walk a forest trail down to a wide beach that’s filled with birds and intertidal creatures. I designed them to suit adventurers of all ages and inclinations, so there are sizes from kid to grownup, along with two versions — a simple, classic look, and a more adorned textured one. Both versions are a quick, satisfying knit and they make great gifts!

A knitted exploration of the sky has to include the sun and the moon. These socks are designed to express whichever energy you’re feeling today. The textured stitch pattern along the legs is not only beautiful and fun to knit, it also adds elasticity to keep your socks fitting comfortably. Sun and Moon colourwork are both simple charts, and they’re interchangeable so you can use either or both!
This pattern was originally the July pattern for the Gauge Dye Works Summer 2019 Yarn + Pattern Club. It’s now available to everyone. It’s included in the SKY collection along with Morning and Evening and Silhouette and Sky. Get the yarn from Gauge Dye Works.